Author: Bill
Mach3 E500 VFD modbus support instructions
Connecting a spindle VFD to Mach3 through the Modbus (RS-485 serial port) is not an easy task, since the required information is spread all around the internet. This post is a step by step set of instructions that hopefully will help someone else get their VFD up and running quickly.
For reference I am using Windows 10, Mach3 R3.043.066, and FDTI serial driver V2.12.16
The E500 VFD is popular on many internet sites, that is why I decided to write the necessary code to do a port including the following commands and status:
- CW spindle
- CCW spindle
- Stop spindle
- Set spindle speed
- Receive spindle RPM and display it in True RPM DRO
- Stop spindle command support
Step 1
Modify the VFD settings changes for RS-485 port control
This step will change the parameters necessary to enable the modbus communications port on the VFD so commands and status can be sent and received between the computer and the VFD. Refer to the Panel operating method section of the VFD manual for the instructions on how to use the front panel controls on the VFD to modify these parameters. They will saved across power on/off cycles, so this only needs to be done once. Please note once these settings are changed, you will no longer be able to control the motor from the VFD front panel.
The E500 required three function values to be modified from the default values.
- F0.00 =2 (default is 3) Frequency input channel
- F0.02=1002 (default is 1000) Running command channel and mode
- F2.19=1 (default is 2) Pairs of motor poles
The VFD is now set to receive commands and send status to/from the serial Modbus (RS-485 port on the side of the VFD) at 9600 baud, even parity.
Step 2
Mach 3 requires several settings be changed to allow commands to be sent and status to be received on the RS-485 ModBus port. Please note the computers do not implement RS-485 directly. You must purchase a USB to RS485 converter. All RS-485 data will be sent out the selected USB port on the computer through the converter, across the RS-485 cable to the VFD. The RS-485 protocol implements a differential electrical connection which provides a great deal of common mode noise immunity which is useful in the CNC environment.
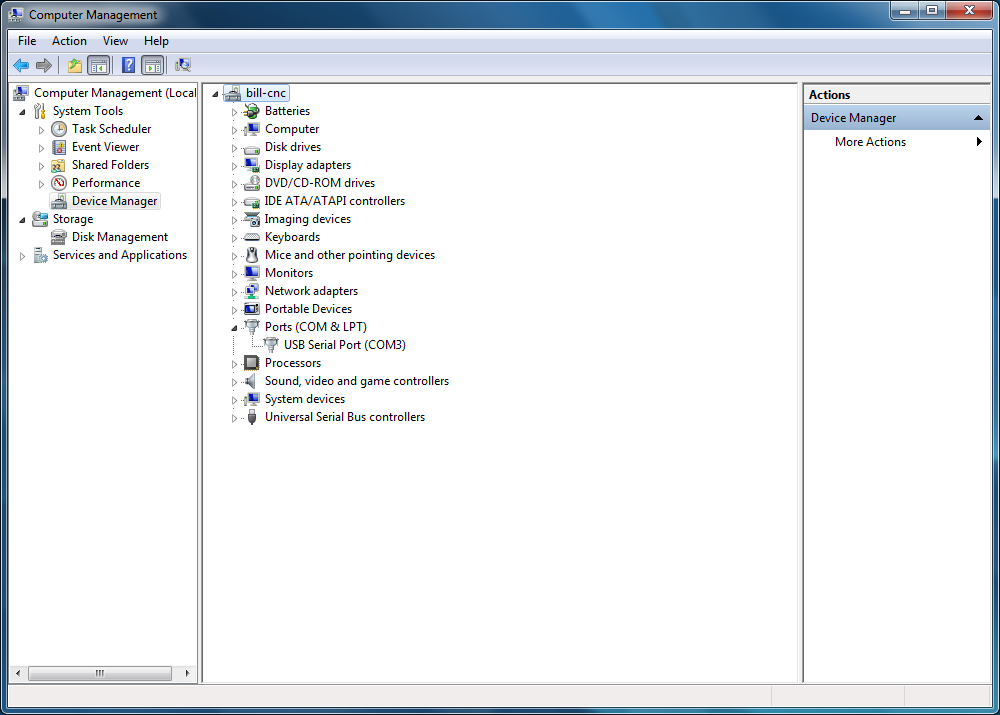
First, it is necessary to install the USB to RS-485 windows driver needed for the convertor. Follow the instructions supplied with your convertor to install the driver. Once the driver is installed, note the comm port it is associated with (Com3 in this case).
The following pictures show the necessary changes to Mach 3 to enable the serial communications port. Once these changes are made they will be permanently stored in the Mach 3 settings.
Locate the engine configuration… Ports and pins menu and check the 2 check boxes shown below in the Restart if changed section.

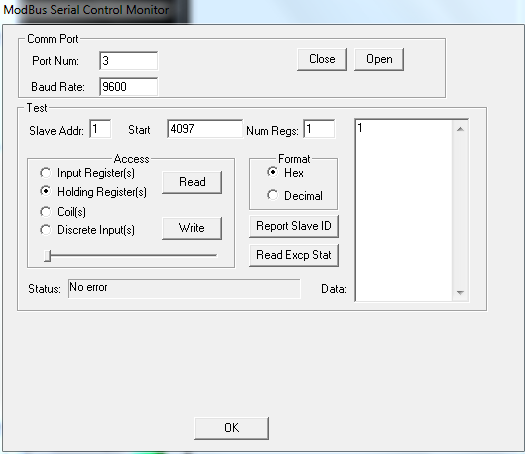
Locate the Modbus serial control monitor and follow the example below. Change the serial port number depending on the Comm port that windows assigns to the serial converter (Com3 in this example).
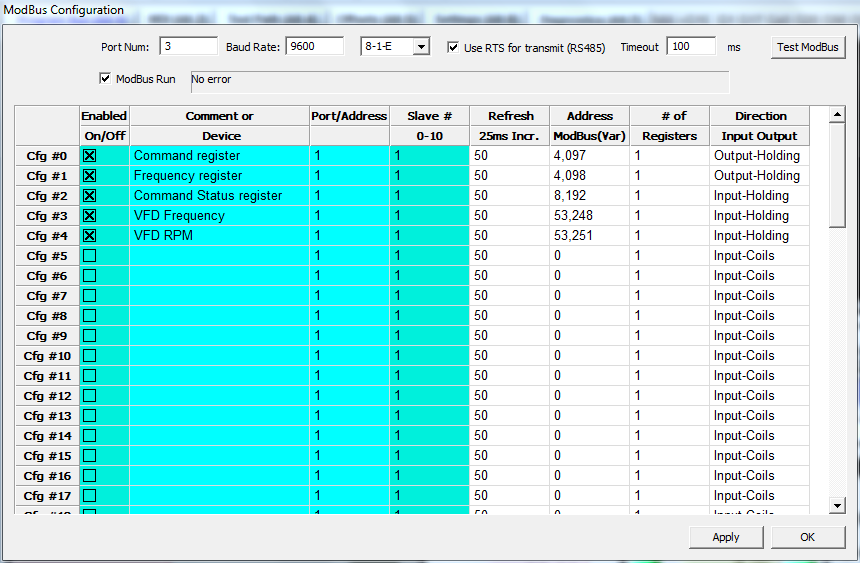
Locate the Modbus configuration menu and fill it in exactly as shown below. This is used to map the addresses in the VFD to the Brain logic which will be implemented in the next step.
After all these settings are made, Mach 3 is configured to send commands and receive status from the VFD.
Step 3
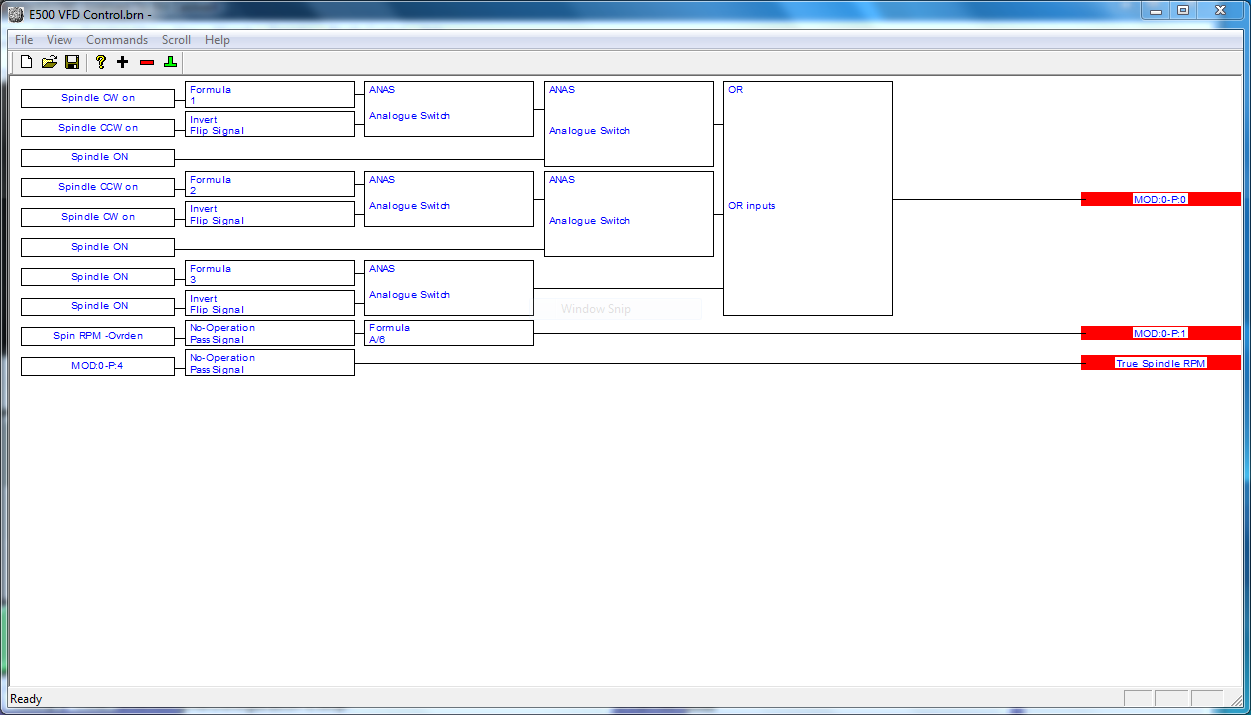
Mach 3 uses, what they refer to as a brain, to implement software ladder logic. It is used to convert the higher level commands (set speed for example) to the lower level commands (and status) necessary for the E500 VFD to operate with Mach 3. The Brain file is available at the following location: request through e-mail to me at bill@caldwellfam.net
The brain file must be downloaded then transferred to the Mach3/Brains folder.
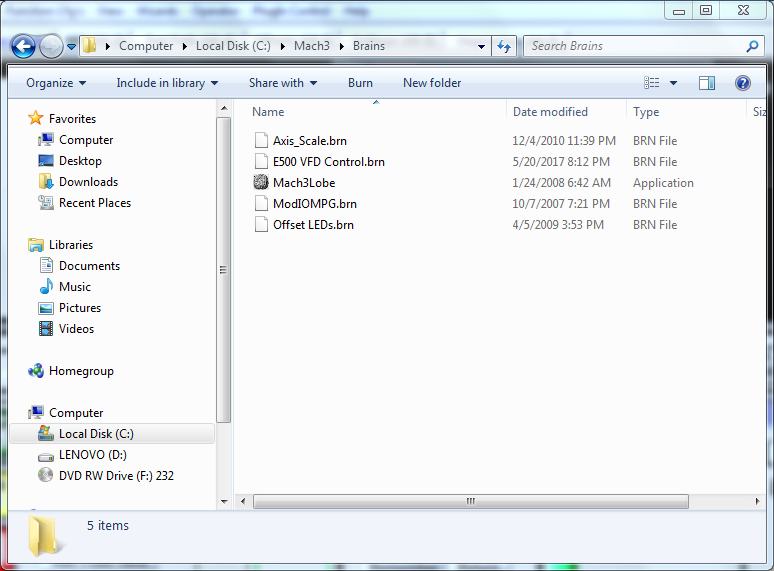
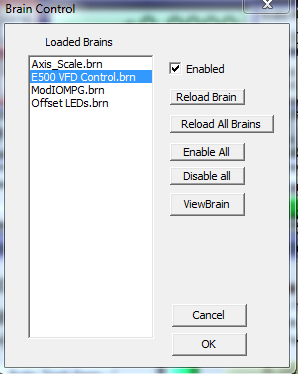
Once it is loaded it must be selected to be used by Mach 3. go the the Brains pull down menu and select the E500 VFD Control.brn file.
Step 4
Initialization files must be added and modified to complete the installation of the VFD control.
First it is necessary to create a macro to allow the RPM of the VFD to be displayed. Using notepad, create a file called M1000.m1s with the contents exactly as shown below. .
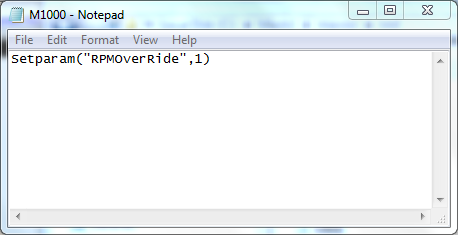
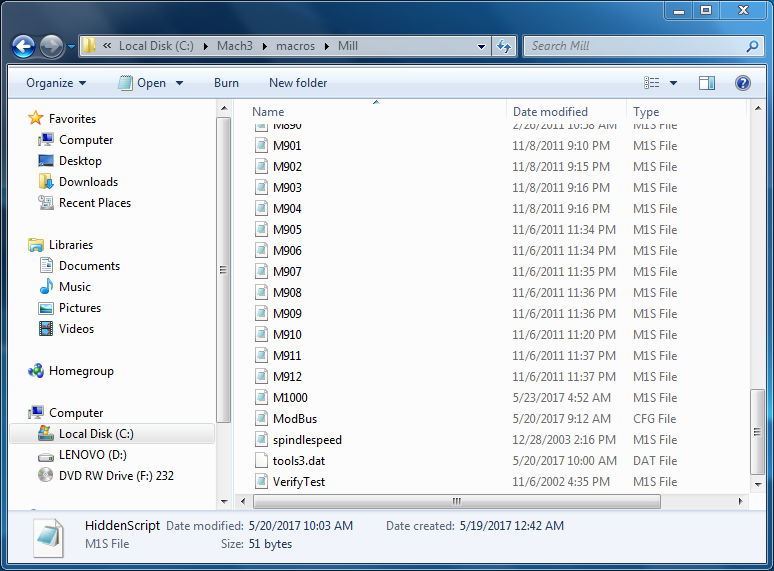
This macro must then be installed in the Mach3/macros/Mill folder.
The last step is to call the newly created init macro and set other init. parameters as necessary. Please refer to the following screen to make the necessary changes.
Some of the check boxes on your screen might differ from this example, but the Initialization string box must be filled out as shown.
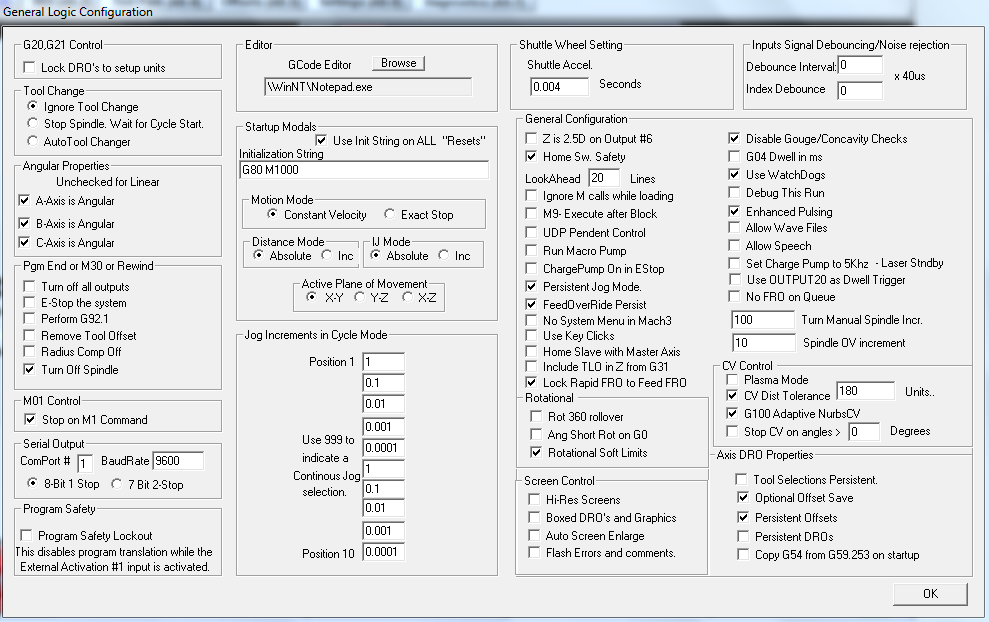
This completes the installation of the necessary files to allow you to control your E500 VFD spindle controller through the normal Mach3 control panel interface and from G code.
Woodcraft CNC Basis Class Information
Here are the two presentations for the CNC-101 class.
In addition here are a couple of companies I use to buy various bits for the CNC machine beyond what Woodcraft normally stocks….
Locally I use Ultratool in Huntington Beach.
5451 McFadden Ave, Huntington Beach 92649
1-800-854-2431
Online I use Drill bit City for speciality small drill bits for drilling PCBs
http://drillcity.stores.yahoo.net/
Woodcraft CNC basics class 6-22-2017
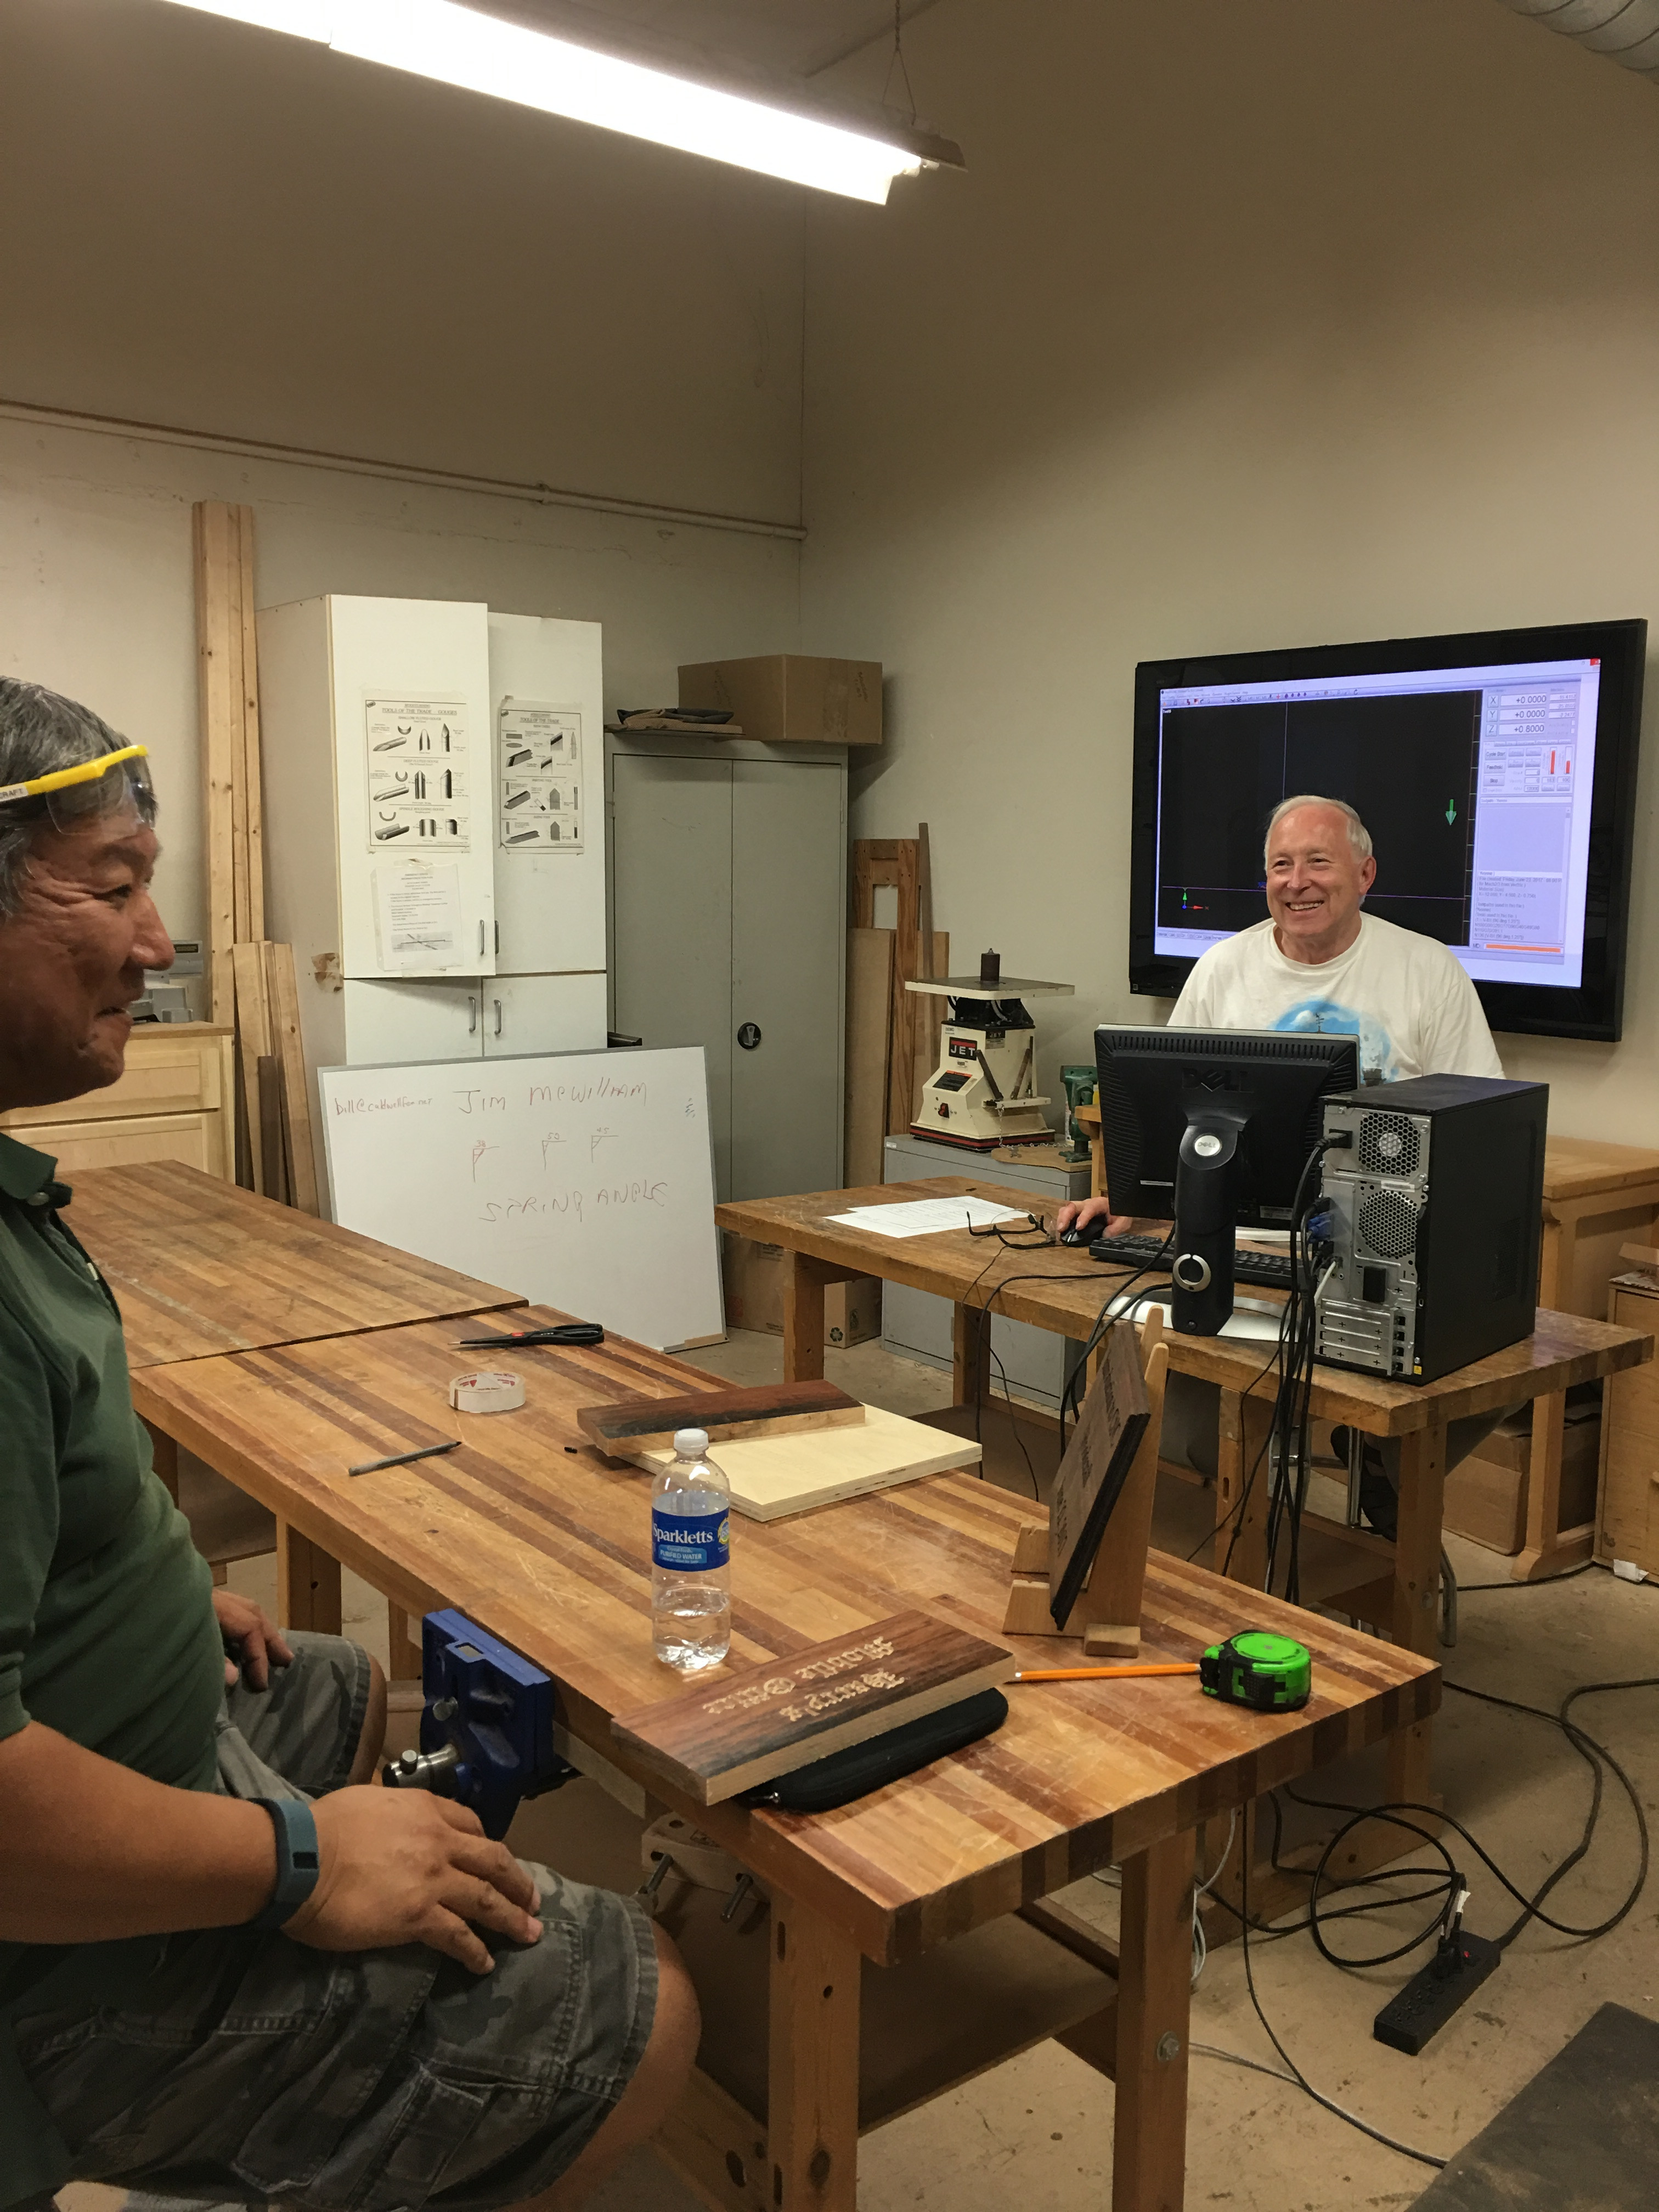
On Thursday (6-22-2017) 6 people met at the Fountain Valley Woodcraft store to learn about basic CNC machines and the software necessary to design, edit, and generate the code to run contemporary CNC machines. Yvonne, Frank, Art, Jeff, John, and Lovell were in attendance. I taught the class which comprised a 56 slide Powerpoint presentation and time on the machine for each person to build a simple custom plaque using VCarve. I had a great time teaching the class!
During the class I indicated that I would publish the presentation and the names of the stores I use to buy various bits for the CNC machine beyond what Woodcraft normally stocks….
Locally I use Ultratool in Huntington Beach.
5451 McFadden Ave, Huntington Beach 92649
1-800-854-2431
Online I use Drill bit City for speciality small drill bits for drilling PCBs
http://drillcity.stores.yahoo.net/
Here is the link to the presentation in PowerPoint and the PDF version.
RX01 floppy disk bootstrap listing
000000: 012702 100247           MOV     #100247,R2
000004: 012701 177170           MOV     #177170,R1
000010: 130211                  BITB    R2,(R1)
000012: 001776                  BEQ     10
000014: 112703 000007           MOVB    #7,R3
000020: 010100                  MOV     R1,R0
000022: 010220                  MOV     R2,(R0)+
000024: 000402                  BR      32
000026: 012710 000001           MOV     #1,(R0)
000032: 006203                  ASR     R3
000034: 103402                  BCS     42
000036: 112711 111023           MOVB    #111023,(R1)
000042: 030211                  BIT     R2,(R1)
000044: 001776                  BEQ     42
000046: 100756                  BMI     4
000050: 103766                  BCS     26
000052: 105711                  TSTB    (R1)
000054: 100771                  BMI     40
000056: 005000                  CLR     R0
000060: 022710 000240           CMP     #240,(R0)
000064: 001347                  BNE     4
000066: 122702 000247           CMPB    #247,R2
000072: 005500                  ADC     R0
000074: 005007                  CLR     R7